How To Create DIY Deer Ears: A Step-by-Step Guide For Cosplay And Fun
Let’s be real, who doesn’t love a good pair of DIY deer ears for cosplay or just a fun day out? Whether you’re attending a costume party, cosplaying as your favorite anime character, or simply dressing up for Halloween, deer ears can be the perfect accessory to elevate your look. But why spend big bucks on store-bought ones when you can make them yourself in no time? Yup, DIY deer ears are easier to create than you think, and we’ve got all the tips and tricks right here for you!
There’s something magical about crafting your own accessories. It not only saves you money but also adds a personal touch to your outfit. In this guide, we’ll walk you through how to create DIY deer ears step by step. From picking the right materials to assembling everything together, we’ve got you covered. So, grab your tools and let’s get crafty!
This isn’t just about making deer ears; it’s about unleashing your creativity and having fun while doing it. Whether you’re a seasoned crafter or a complete beginner, this guide will help you create stunning deer ears that’ll make heads turn. Ready to dive in? Let’s go!
- Alert Fda Ramen Noodle Recall 2024 What You Must Know
- The Ultimate Guide To Ramen History Types How To Enjoy It
Why DIY Deer Ears Are Worth the Effort
Okay, let’s talk about why creating DIY deer ears is such a great idea. First off, they’re super customizable. You can choose the exact colors, textures, and styles that suit your outfit or mood. Plus, they’re way cheaper than buying ready-made ones. And hey, making them yourself is just plain fun! Who wouldn’t want to say, “Yeah, I made these myself” when someone compliments your deer ears?
Here’s the thing: crafting isn’t just about the end result; it’s about the journey. The satisfaction of creating something with your own hands is priceless. And trust me, once you’ve made your first pair of deer ears, you’ll be hooked. So, if you’re ready to save some cash, flex your creative muscles, and have a blast, keep reading!
What You’ll Need to Get Started
Before we dive into the nitty-gritty of creating your deer ears, let’s talk about what you’ll need. Having the right tools and materials can make all the difference in your crafting experience. Here’s a quick list to help you get started:
- Foam sheets (for the ear shapes)
- Headband (sturdy and comfortable)
- Fabric or felt (for covering the foam)
- Hot glue gun and glue sticks
- Scissors
- Pencil or marker
- Decorative items (optional, like ribbons, beads, or fur)
These are the basics, but feel free to add your own flair with additional materials. The beauty of DIY projects is that there’s no right or wrong way to do them. Just remember, the quality of your materials can affect the final look, so choose wisely!
Step 1: Designing Your Deer Ears
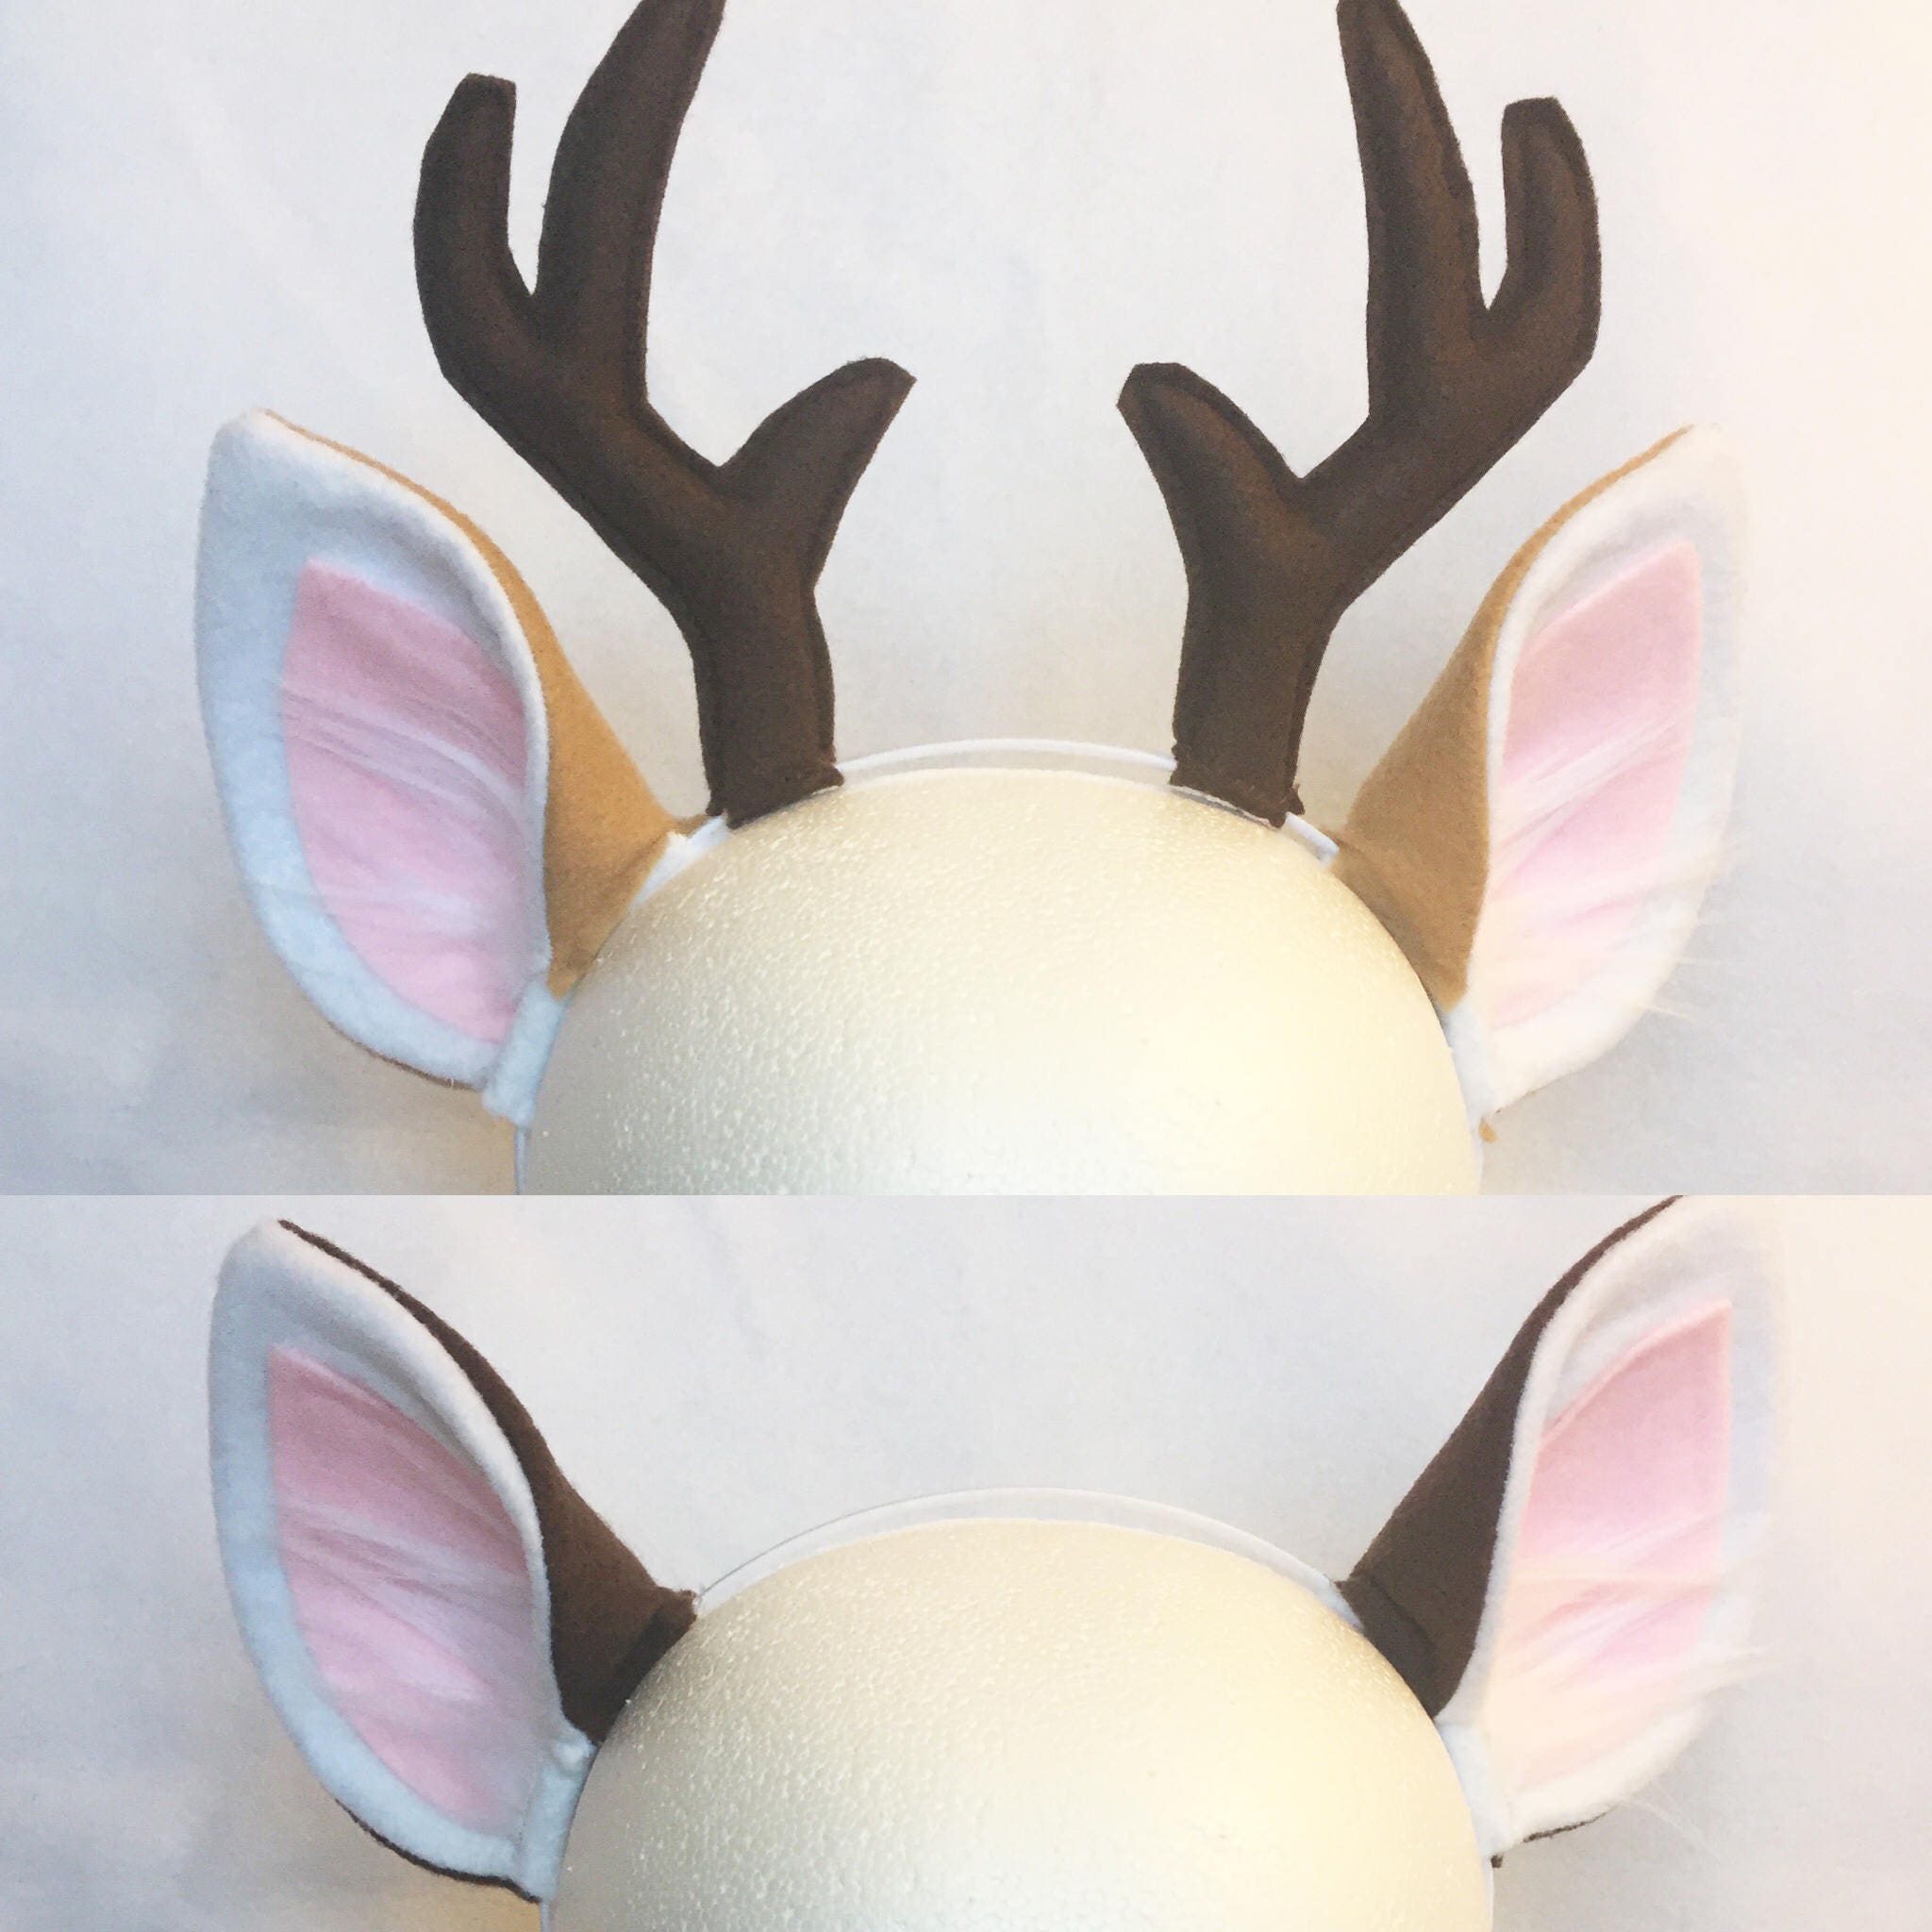
Now that you’ve got your materials ready, it’s time to design your deer ears. This is where the fun begins! Start by sketching the shape of the ears on your foam sheet. You can go for classic deer ears or get creative with different shapes and sizes. Don’t be afraid to experiment—this is your project, after all!
Once you’ve sketched the design, cut out the foam pieces carefully. Make sure they’re symmetrical so your deer ears look balanced. Pro tip: if you’re not confident in your freehand skills, you can print out a template online and trace it onto the foam. Easy peasy!
Choosing the Right Shape
When it comes to designing your deer ears, the shape is everything. Traditional deer ears are usually tall and pointy, but you can always mix things up. Want something more whimsical? Try rounded tips or even split ears. The possibilities are endless!
Step 2: Covering the Foam with Fabric
Now that you’ve got your foam ear shapes, it’s time to cover them with fabric or felt. This step is crucial because it gives your deer ears that polished, finished look. Start by cutting your fabric slightly larger than the foam pieces. Then, use your hot glue gun to attach the fabric to the foam, making sure to smooth out any wrinkles as you go.
If you’re feeling extra fancy, you can add some decorative elements at this stage. Think ribbons, beads, or even faux fur for that extra cozy vibe. Just remember, less is sometimes more, so don’t overdo it unless that’s the look you’re going for!
Tips for a Smooth Finish
Here are a few tips to help you achieve a smooth finish when covering your foam ears:
- Use a small amount of glue at a time to avoid drips.
- Trim any excess fabric after gluing for a clean edge.
- Let the glue dry completely before moving on to the next step.
These little tricks can make a big difference in the final look of your deer ears. Trust me, the extra effort is worth it!
Step 3: Attaching the Ears to the Headband
Alright, we’re almost there! The next step is attaching your beautifully crafted deer ears to the headband. This is where your hot glue gun will come in handy again. Apply a generous amount of glue to the back of each ear and carefully press it onto the headband. Make sure they’re securely attached and evenly spaced.
If you want an extra secure attachment, you can reinforce it with a few stitches using a needle and thread. This is especially useful if you plan on wearing your deer ears for extended periods or during activities where they might get jostled around.
Positioning the Ears
Positioning your deer ears correctly is key to achieving that natural look. Aim for a slight angle, with the ears pointing slightly forward. This mimics the way real deer ears would sit on their heads. And remember, symmetry is important—make sure both ears are aligned properly!
Step 4: Adding the Finishing Touches
With the ears securely attached to the headband, it’s time to add those finishing touches that’ll make your DIY deer ears truly stand out. This is where you can let your creativity shine. Want to add some glitter for a magical effect? Go for it! How about some bells for a jingly touch? Absolutely! The options are endless.
Another great idea is to add some faux fur around the base of the ears for a softer, more realistic look. Or, if you’re feeling bold, you can paint designs on the fabric for an extra pop of color. Just remember to let any paint or glue dry completely before wearing your deer ears.
DIY Deer Ear Variations
Here are a few ideas to inspire your DIY deer ear creations:
- Furry deer ears with faux fur accents
- Glow-in-the-dark deer ears for nighttime events
- Sparkly deer ears with glitter and rhinestones
- Seasonal deer ears with fall leaves or winter snowflakes
The sky’s the limit when it comes to customizing your deer ears. So, let your imagination run wild!
Troubleshooting Common Issues
Even the best crafters run into issues from time to time. Here are a few common problems you might encounter while making your DIY deer ears and how to fix them:
- Glue not holding: Make sure you’re using enough glue and letting it dry completely before handling the ears.
- Asymmetrical ears: Double-check your measurements and adjust as needed before attaching the ears to the headband.
- Fabric wrinkling: Take your time when gluing the fabric to the foam, smoothing it out as you go.
Remember, mistakes are just opportunities to learn and improve. So, don’t stress if things don’t go perfectly the first time around!
Cost Comparison: DIY vs Store-Bought
Let’s talk numbers for a moment. Making your own deer ears can save you a ton of money compared to buying them from a store. On average, a pair of store-bought deer ears can cost anywhere from $15 to $50, depending on the quality and brand. On the other hand, the materials for DIY deer ears typically cost around $5 to $10, depending on what you already have at home.
Plus, when you make them yourself, you’re not just saving money—you’re also getting a unique accessory that no one else will have. And let’s be honest, that’s priceless!
Long-Term Savings
Think about it: once you’ve mastered the art of making DIY deer ears, you can create as many pairs as you want for future events. That’s a lot of savings over time, not to mention the satisfaction of knowing you made them yourself!
Final Tips and Tricks
Before we wrap things up, here are a few final tips to help you create the best DIY deer ears possible:
- Take your time and don’t rush the process.
- Experiment with different materials and designs.
- Have fun and enjoy the creative process!
Remember, crafting is all about expressing yourself and having fun. So, don’t be afraid to try new things and make mistakes along the way. Every project is a learning experience, and the more you practice, the better you’ll get!
Conclusion
Creating DIY deer ears is a fun and rewarding project that anyone can enjoy. From designing the perfect ear shape to adding those finishing touches, every step of the process is an opportunity to express your creativity. And let’s not forget the cost savings and satisfaction of making something with your own hands.
So, what are you waiting for? Grab your materials and start crafting those deer ears today! And don’t forget to share your creations with us in the comments below. We’d love to see what you come up with. Happy crafting!
Table of Contents
How to Create DIY Deer Ears: A Step-by-Step Guide for Cosplay and Fun
Why DIY Deer Ears Are Worth the Effort
What You’ll Need to Get Started
Step 1: Designing Your Deer Ears
Step 2: Covering the Foam with Fabric
Step 3: Attaching the Ears to the Headband
Step 4: Adding the Finishing Touches
Cost Comparison: DIY vs Store-Bought
- Alert Recent Ramen Noodle Recalls What You Need To Know
- Unlock Stock Success A Deep Dive Into 5starsstockscom Materials Guide

How To Create Diy Deer Ears A Stepbystep Guide For Cosplay And Fun
How To Create DIY Deer Ears A StepbyStep Guide For Cosplay And Fun

How To Create DIY Deer Ears A StepbyStep Guide For Cosplay And Fun
