How To Create A Stunning DIY Ribbon Rose Bouquet Step-by-Step Guide
Creating a stunning DIY ribbon rose bouquet is one of those projects that will leave you feeling like a true artist. imagine this—you’re sitting at your kitchen table surrounded by colorful ribbons, floral wire, and scissors. Your hands are working magic as you shape each rose petal with precision and care. And before you know it, you’ve crafted a bouquet that looks like it came straight out of a high-end floral shop. but guess what? you made it yourself! let’s dive right into this amazing journey, because who doesn’t love a beautiful bouquet without breaking the bank?
Whether you’re looking to add a personal touch to a wedding, celebrate a special occasion, or simply brighten up your home, learning how to create a stunning DIY ribbon rose bouquet is a skill that pays off big time. Not only does it save you money, but it also allows you to customize every single detail according to your preferences. So, roll up your sleeves, grab your supplies, and let’s get started on this floral adventure!
By the end of this guide, you’ll have all the tools and knowledge you need to craft a masterpiece that will impress anyone who sees it. trust me, once you master the art of making ribbon roses, you’ll be hooked. Now, let’s not waste any more time—here’s everything you need to know about creating a breathtaking DIY ribbon rose bouquet step by step!
- Urgent Top Ramen Recall Alert What You Must Know Safety Tips
- Urgent Cdc Issues Ramen Noodles Recall What You Need To Know
Table of Contents
- Introduction
- Tools and Materials You’ll Need
- Choosing the Right Ribbons
- Basic Techniques for Crafting Ribbon Roses
- Step-by-Step Guide to Making Ribbon Roses
- Arranging Your Ribbon Rose Bouquet
- Customizing Your Bouquet Design
- Tips and Tricks for Perfect Ribbon Roses
- Troubleshooting Common Issues
- Final Touches and Presentation
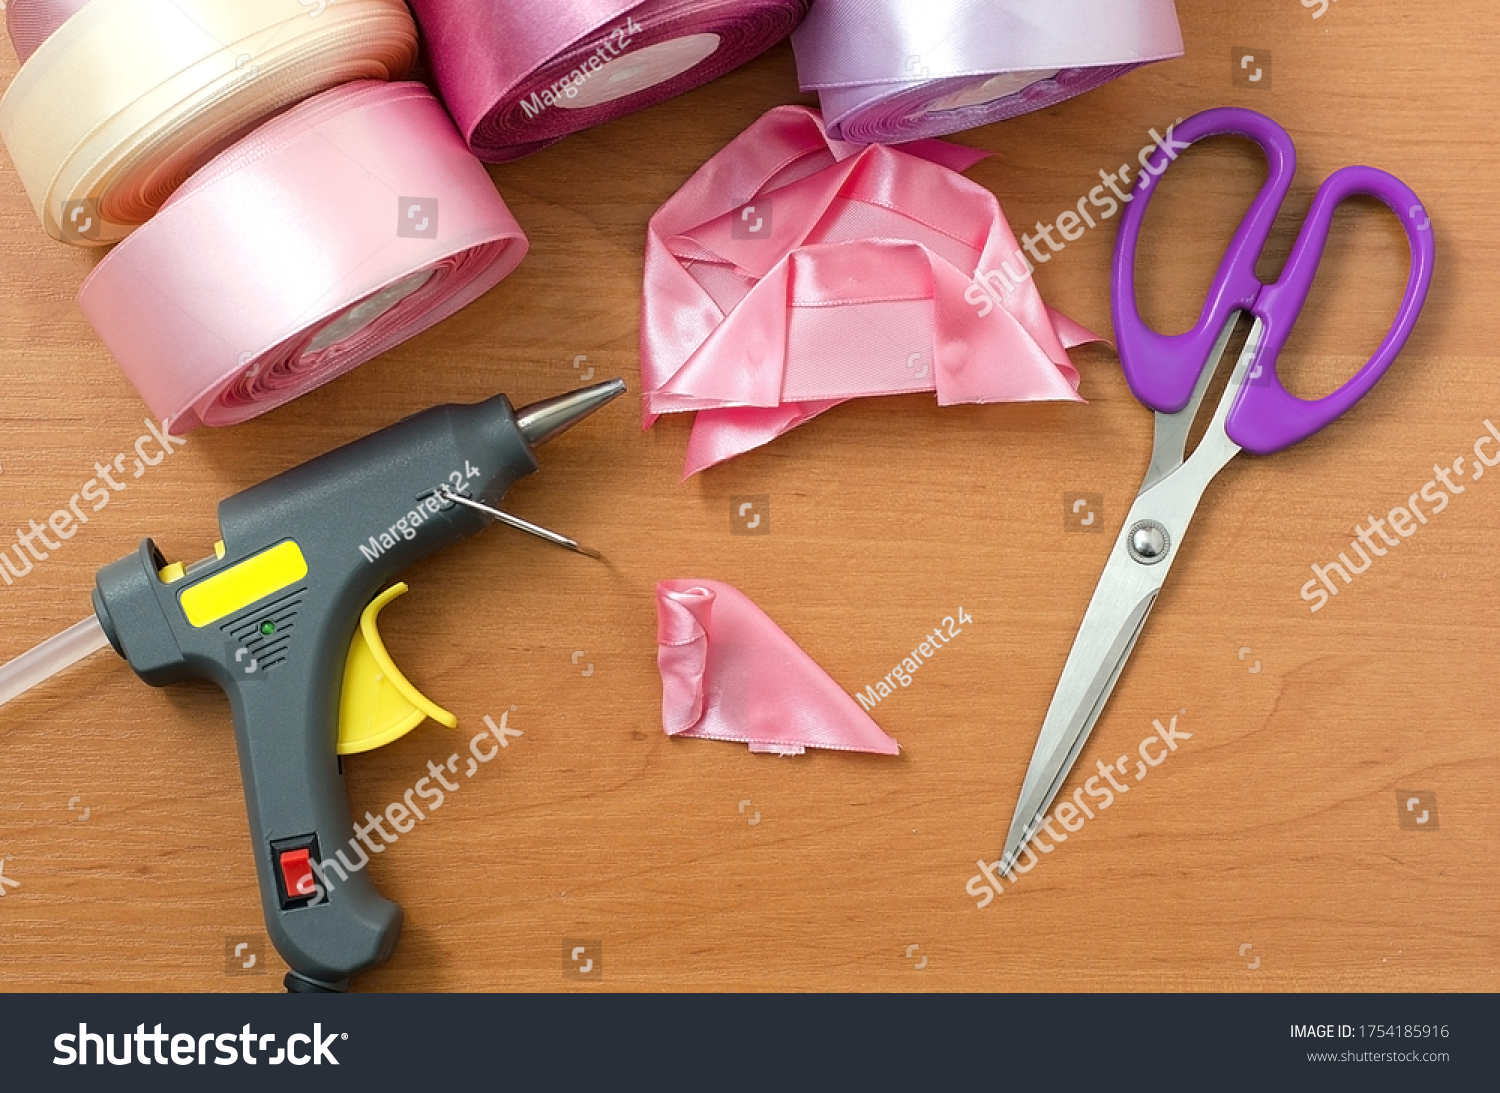
Tools and Materials You’ll Need
before we dive into the nitty-gritty of crafting your bouquet, let’s talk about the essential tools and materials you’ll need. having the right supplies will make your project smoother and more enjoyable. here’s a quick rundown:
- Wide variety of ribbons (satin, organza, or grosgrain work best)
- Floral wire (20-gauge is ideal for stability)
- Floral tape (green works great for hiding wires)
- Scissors (sharp ones to avoid fraying)
- Hot glue gun (optional, for additional bonding)
- Floral foam or bouquet holder (for arranging)
- Greenery or filler flowers (optional, for added flair)
these items are easy to find at most craft stores or online retailers. don’t forget to choose colors and textures that complement each other for a cohesive look. remember, preparation is key!
Choosing the Right Ribbons
when it comes to crafting ribbon roses, the type of ribbon you choose can make or break your bouquet. here’s what you should consider:
- Alert Has Ramen Noodles Been Recalled Safety Guide Tips
- Unveiling Donald Trump Jeffrey Epstein Whats The Real Story
1. Satin Ribbons: these are smooth, shiny, and perfect for creating luxurious roses. they hold their shape well and add an elegant touch to any bouquet.
2. Organza Ribbons: lightweight and delicate, organza ribbons are great for adding texture and airiness to your design. they’re ideal for soft, romantic bouquets.
3. Grosgrain Ribbons: if you’re going for a rustic or vintage vibe, grosgrain ribbons are the way to go. they’re durable and come in a wide range of colors.
mixing different types of ribbons can create a stunning visual effect. just ensure they complement each other in terms of color and texture.
Basic Techniques for Crafting Ribbon Roses
now that you’ve gathered your materials, it’s time to learn some basic techniques that will help you create stunning ribbon roses. here are the essentials:
1. Cutting the Ribbon: cut your ribbon into strips of varying lengths, depending on the size of your roses. for smaller roses, 6-8 inches works well, while larger roses may require 10-12 inches.
2. Forming the Petals: use your fingers or a small tool to curl the edges of the ribbon. this gives your petals a natural, organic look.
3. Wrapping the Wire: secure the base of each rose with floral wire. wrap the wire tightly around the stem to keep everything in place.
4. Adding Tape: cover the wire with floral tape to hide it and give your rose a polished appearance.
mastering these techniques will make the rest of the process a breeze. take your time and practice until you feel confident in your skills.
Step-by-Step Guide to Making Ribbon Roses
ready to create your first ribbon rose? follow these simple steps:
- Cut a strip of ribbon to your desired length.
- Form the center of the rose by twisting the ribbon into a small loop.
- Wrap the floral wire around the base of the loop to secure it.
- Begin adding petals by folding the ribbon into loose folds and wrapping them around the center.
- Continue adding layers of petals, gradually increasing the size of each layer.
- Once you’ve reached your desired size, trim the excess ribbon and secure the base with floral tape.
and there you have it—a beautiful ribbon rose! repeat this process as many times as needed to create a full bouquet.
Arranging Your Ribbon Rose Bouquet
once you’ve crafted enough roses, it’s time to arrange them into a stunning bouquet. here’s how:
1. Start with a Focal Point: choose one or two of your largest roses to serve as the centerpiece of your bouquet.
2. Add Smaller Roses: surround the focal point with smaller roses, alternating colors and textures for added interest.
3. Incorporate Greenery: add filler flowers or greenery to fill in gaps and create a balanced look.
4. Secure the Stems: use floral tape or ribbon to bind the stems together, ensuring your bouquet holds its shape.
5. Trim Excess Stems: cut the stems to your desired length, making sure they’re even for easy handling.
with these steps, you’ll have a beautifully arranged bouquet that’s ready to impress!
Customizing Your Bouquet Design
one of the best things about DIY projects is the freedom to customize them to your liking. here are some ideas to make your bouquet truly unique:
- Experiment with different ribbon patterns and textures.
- Add embellishments like pearls or beads for a touch of elegance.
- Include seasonal elements, such as leaves or berries, for a festive look.
- Use metallic ribbons for a modern, trendy design.
- Create a cascading bouquet by varying the lengths of your roses.
let your creativity shine and make your bouquet a reflection of your personal style!
Tips and Tricks for Perfect Ribbon Roses
here are some insider tips to help you achieve flawless ribbon roses:
- Use a candle or lighter to seal the edges of your ribbon and prevent fraying.
- Practice different folding techniques to create varied petal shapes.
- Keep a spray bottle handy to dampen your ribbons slightly, making them easier to shape.
- Store your finished roses in a cool, dry place to preserve their quality.
- Don’t rush the process—take your time to ensure each rose is perfect.
these tips will elevate your craftsmanship and ensure your bouquet looks professional.
Troubleshooting Common Issues
every crafter encounters challenges along the way. here’s how to tackle some common problems:
- Fraying Edges: use a candle or lighter to seal the edges of your ribbon.
- Loose Petals: reinforce the base with hot glue or extra floral tape.
- Uneven Shapes: adjust the petals gently with your fingers until they’re symmetrical.
- Difficulty Shaping: try dampening the ribbon slightly to make it more pliable.
with a little patience and problem-solving, you’ll overcome any obstacles and create a masterpiece.
Final Touches and Presentation
your bouquet is almost complete, but don’t forget the finishing touches that make it truly special:
1. Wrap the Stems: use a decorative ribbon to wrap the stems, tying it off with a bow for a polished look.
2. Add Accessories: consider adding a charm, brooch, or other embellishments for extra flair.
3. Display Proudly: whether you’re giving your bouquet as a gift or keeping it for yourself, find a spot where it can be admired.
and just like that, you’ve created a stunning DIY ribbon rose bouquet that’s sure to turn heads. congratulations on your newfound skill!
Kesimpulan
in this step-by-step guide, we’ve covered everything you need to know about creating a stunning DIY ribbon rose bouquet. from choosing the right materials to mastering the techniques, you now have the tools to craft a masterpiece. remember, practice makes perfect, so don’t be afraid to experiment and make it your own.
so, what are you waiting for? grab your supplies and start crafting your dream bouquet today! and when you’re done, don’t forget to share your creations with the world. leave a comment below to let us know how your project turned out, and feel free to check out our other guides for more creative inspiration. happy crafting!

How To Create A Stunning DIY Ribbon Rose Bouquet StepbyStep Guide

Ribbon Rose Bouquets
Stepbystep Instruction Rose Made Satin Ribbon Stock Photo (Edit Now
